Tuesday, April 6, 2010

Wall-E! (Tip o' th' Hat to Barry)

Ran down to the house site this pip emma and threw up the wall seen in the previous post.  It be brace-ed and relatively stable, and, with my imminent departure to worlds unknown for the next 10 days, it'll be quite the feather in my construction hat if The Thing still stands upon my return thereunto--if my construction hat has a place for feathers.  Perhaps I'm getting my Village People characters mix-ed up.

Notice, too, that the mid-to-late afternoon sun is largely shaded on my southern (windowed) and partially shaded on the western wall.  Nice going, Mother Nature; you put the trees in exactly the right spot for my cooling comfort during the impending Dog Days ahead.

On the way out, this monstrosity lay in my path.  I waited for his sluggish self to slytherin off before Bucky and I could make good our escape.

We celebrated with gas station biscuits and fried thingummies.

Friday, April 2, 2010

Wall Y'all

After finishing the last small section of subflooring in the northwest corner of the bedroom, I began laying out and marking for the erection of the west wall of 10'4".  The walls will be 8' up to a ledge where the 1 in 12 shed roof will start.  The area between the top of the wall and the roof will be glass in a large, low angle triangle to the taper in back and have glass in the about 12" of front area above the south wall.


Also, after making a fortuitous wrong turn in Lebanon, I stumbled upon a cache of curbed items and then gleaned the material below--some 1x12s, a 10'x10' silver tarp in perfect condition, and several sheets of transparent green roofing material that can eventually replace the worn tin shed roof some day.

My sister and hubby (and dog) are in town to speak to the cabinet maker and the contractor.  She's really pleased with the house as it's progressing and also likes my build.  Glad she's glad.

More tomorrow--hopefully have at least one wall up and stable.

Thursday, April 1, 2010

The View From Above

My NAPA chum Jerry Kirby took me down to Lebanon today in his 1957 Cessna.  Jerry has a late 1940s Swift in which he does aerobatics, but we didn't take that one, sadly.

Anyhoo, Jerry had told me to take my camera and we could get some shots of the land from the Eye in the Sky. And hairrrrr they are:

You can see that Jan's house is almost done, whilst mine has the subfloor on the left (and you can almost make out the little shed to the north).  This is taken to from the southeast.


Again, my little 12x10 rectangle can be seen about 100 feet from Jan's house, now seen from the northwest somewhat.

More work and another post this weekend.  Hopefully, a wall will be up!

Then, Jerry and I flew over towards the Nashville Raceway and landed at a private airstrip that is commonly owned by pilots that live on the edges of the strip.  One of his buddies, a guy named Steve, had us to a great lunch of soup and salad out on his back deck on a gorgeous day.

At the end of lunch, Steve said to me, "How'd you like to go up in the Stearman biplane and do some aerobatics?"  Steve restores and works on planes; his current project is a 1927 Waco, but he has previously restored a 1943 Stearman trainer.  This open cockpit biplane is much heavier than Jerry's Cessna, and much slower, too.  But after strapping in the front seat, putting on the headgear and trying to stay calm, Steve and I took off and flew over the speedway nearby.  Steve did loops and turns and rolls, including an Immelmann, and he did some stalls and dives.  After about 20 breathtaking minutes, we came back to earth.


Jerry and I then headed for home and on the way, he let me take the controls some.  All in all, a great day.

Saturday, March 27, 2010

It Simply Floors Me

 "My God, man!  You've struck sub-floor!"

While I'm not sure Hawkeye said those exact words to Frank Burns, the sentiment fits my work today.  Bucky and I spent five hours on a clear, warm March day, working on my sub-floor.

The 3/4" T&G was supplied by Terry Garrison of Homepro(tm).  Mucho appreciado.  Now I'm channeling Col. Potter for some reason. Anywho.

12'x10' means four sheets of plywood to cover the floor joists, right?  3 whole sheets at 8'x4' plus 3/4ths of another sheet for the 2'x12' section.  Yes, that's what it would be if the entire structure were A.) square and 2.) Level.

Which, to my dismay, I found it was decidedly not so.  Neither square nor level.

Joe Gregory--he of years of framing experience--said, Yoda-like, "Square you must be; level would be nice."    You wouldn't believe how far OUT of square I was.  I say, 'was' because I am not now out of square (Neither is the house! See what I did there?  See...it's...never mind.).

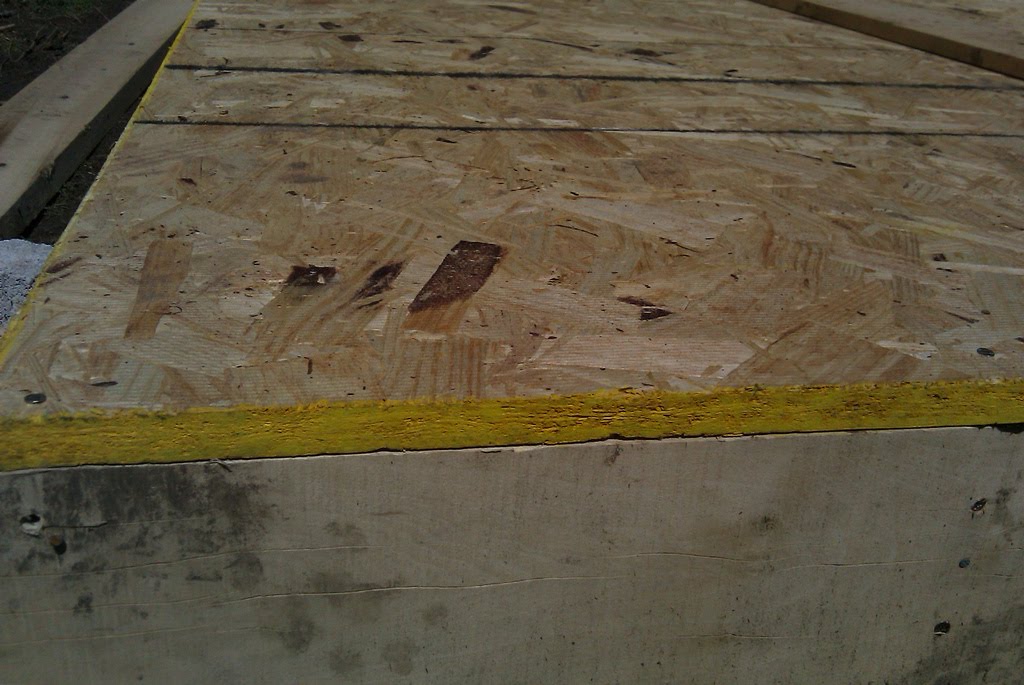
So what's a dirt-cheap builder to do?  After a phone consultation with my brother Sid and with input from our neighbor Ralph, I simply squared the outer 2"x6" floor joists to the square created by the tongue and groove plywood.  This was accomplished by removing the outer joists on three sides and then reattaching them to the front 12' joist and lining the reattached joists up to the edge of the plywood.  The first picture shows the front 2"x6"x12' joist with said plywood nailed to the front edge of the joist.  On the left in the background, one can spy the temporarily removed 2"x6"x10' side joist that was eventually reattached along the outside edge of the plywood to make it all squarsies.

And that worked.  With one small issue--my house is not exactly 12'x10'; no, rather, it's 12'x10'4".  The 12' front and back joists are actual 2"x's since they were from Compton's Sawmill.  I hadn't taken the extra 4" into account (2" for each joist).  That meant that the fourth plywood sheet was slightly too small to cover the remaining open joist area.  What you see here is deceptive; I have, yes, 5/6ths of the floor attached and square.  The back right corner (as the next photo shows) is actually not attached and leaves a small gap of--you guessed it--two feet, four inches wide and four feet long.

So, I must get my gleaning hands on about a 1/2 sheet of 3/4" plywood to finish the job.

All in all, a great day of problem solving and learning.

Next up:  Wall Raisin' (and that doesn't mean dried grapes attached to walls, it means--well, you know).

P.S.  Poor Buckmeister!  Sunburned, filthy, tick-infested and tired.  Bucky was, too.  But he was happy having chased turkeys and rocks all day in the woods (he caught the rocks--they're more his speed).  He did a dance on the part of the floor that is finished as the picture suggests.

P.P.S. Some of the intrepid readers of this blog have asked for pix of my sister's house.  Here's one (left) showing the front porch waiting for stairs to be built up to it.


Wednesday, March 24, 2010

Blame it on the Rain

So sorry for the pop music reference in the title, but with rain fast approaching tomorrow, I thought I'd better try to get some work done on the site.  So, today, I put the screen mesh over the floor joists (first pic) and then added the vapor barrier over it all (second pic).
Notice the gravel now spread under the framing's footprint.

Thus, if all goes well as far as drying out over the weekend, I'll lay down my tongue and groove 3/4" plywood on Tuesday of next week--Lord willing (and the creeks don't rise--literally).

Again, access gained to the site via the 'road' cut from Jan's house to mine.  Also sawed some tree limbs off that pathway.

Sunday, March 21, 2010

A Shortened Work Day


After spending Friday working with my parishioner, Greg Starnes, with his crew that drains farmland, I worked some Saturday on the house.

Work accomplished, as shown in these pictures, was:
1.) Finished cross-bracing the floor joists in preparation for the 3/4" T&G plywood subflooring
2.) Put down pea gravel under the joists to keep down weeds
3.) Brought another load from the storage shed in Lebanon (see photo of nail buckets and plywood stack)
4.) The truck accessed the site for the first time by the 'road' I cut from Jan's house to my house site (i.e., not using Ralph's land to drive through)--and it worked wonderfully.

So, the next time, I'll put down (in order) the screen to keep out bugs, the vapor barrier, and then the 3/4" subfloor.  After that will come the wall framing!

Until then,

cm

P.S. The building inspector, right, checks to see if the corner is square.  He hiked his leg in approval, so I guess we've passed inspection.

P.P.S. You may can tell that the site is considerably greener since the last post.  Also, the ticks are out in force, and both Bucky and I had to comb through our fur for the little buggers.

Friday, March 5, 2010

Progress (Babbitt-like, He Cried)!!


With the shed sorta finished, I started on the floor joists and the supports.

Again, the joists are 2x6s 10' long and the end caps are 2x6s at 12'.  2x6s act as cross supports.

What I did was (temporarily) nail down some 1/2" plywood in one corner as a work area and staging place--I'll take it up later.

After all cross supports are in place, I'll put down some gravel under the structure, then put 1/2" Styrofoam(tm) insulation and add 3/4" plywood for the subfloor.

It's coming along.

And remember--all of this--including nails, hammers, saws, wood, and insulation--has cost me nothing other than gas money!